Are you ready to expand your ecommerce business and tap into the vast customer base of one of the world’s largest retailers? Selling on Walmart’s marketplace can be a game-changer for your business, but getting started may seem daunting at first. Fear not! 🛒🚀✨
In this step-by-step tutorial, I’ll walk you through the process of registering as a third-party seller on Walmart. Let’s dive in:
Step 1️⃣: Visit Walmart’s Marketplace Seller Registration Page
Head over to Walmart’s official marketplace seller registration page to begin the process. You can easily find this page by searching for “Walmart Marketplace Seller Registration” on Google.
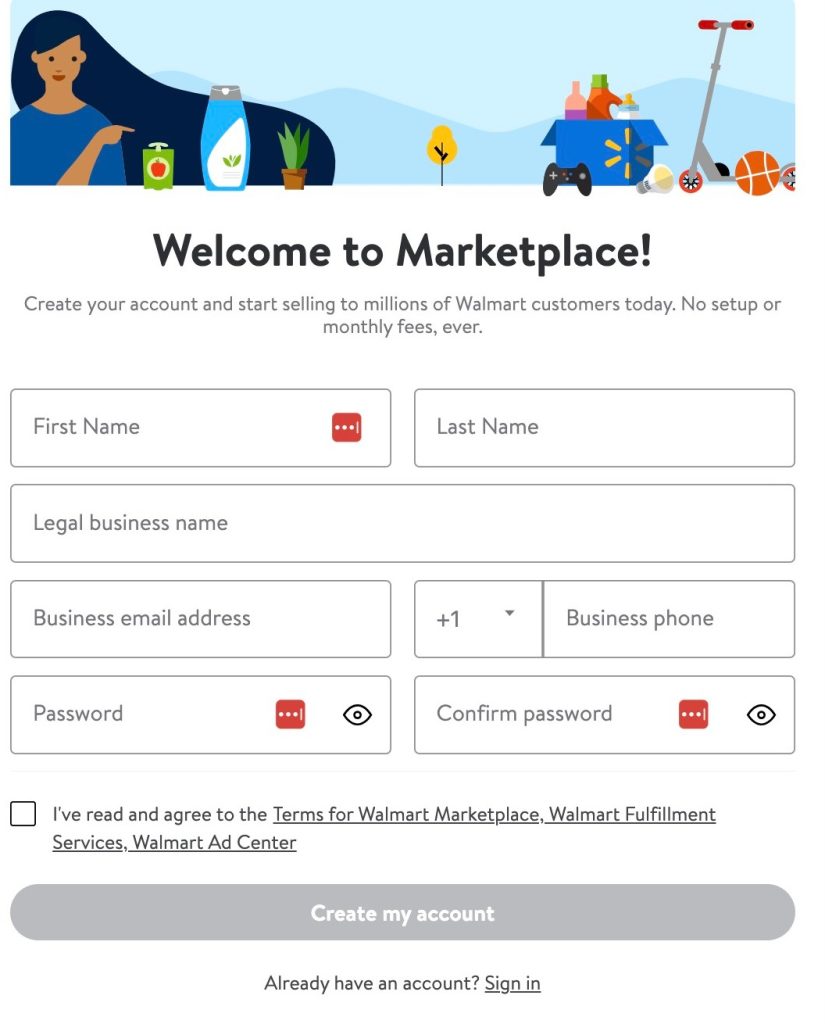
Step 2️⃣: Create Your Walmart Seller Account
If you are an international seller, Walmart will greet you with: “We love international sellers! To become one, you will need to have a US Tax ID Number (TIN) or be incorporated in: Canada. ” So make sure you prepare these docs in advance.
⚠️ Note, that Walmart requires you to have a Legal business company registered already prior to signing up with them.
Click on the “Sign Up” or “Create my account” button to create your Walmart seller account. You’ll need to provide basic information such as your business name, contact details, and a valid email address. Make sure to choose a strong password to secure your account.
Step 3️⃣: Complete the Application Form
Once you’ve created your account, you’ll be prompted to complete an application form. This form will ask for additional details about your business, including your tax identification number, business address, and bank account information for payment processing.
⚠️ You will be required to enter phone number for sms verification. If your country not on the list, you might have to get Google voice number or other internet phone service.
Step 4️⃣: Provide Documentation
Walmart may require you to submit certain documentation to verify your identity and business credentials. This may include business licenses, tax documents, and proof of product liability insurance. Be sure to have these documents ready to expedite the verification process.
⚠️ What not to say to Walmart to avoid your application denied?
During the registration process, Walmart may ask you to provide other information such as your Amazon storefront url, or website where you already sell. If you provide your Amazon store to them, make sure your account is in good standing (check your feedback score). If your Amazon is Just launched or have bad reviews, I would (personally) not advise giving it to Walmart.
Walmart may also be interested in the details of your previous online selling experience. When you answering these inquiries, understand that WLM prefers dealing with experienced sellers who will not bug their seller support every three minutes. The same logic applies to when you are asked about your sales volume. I am not saying that you will definitely get denied if your sales are low, but just be aware that this may be a factor.
If you are prompted to answer about how will you fulfill your products to their customers, do not indicate anything about using Amazon FBA. Using Amazon FBA MCF to ship to Walmart customers is against Walmart TOS and will get your application denied before you even started. Walmart’s expectation that you will ship each and every order by yourself; use 3P fulfillment companies not affiliated with Amazon, or use their Walmart Fulfillment Program.
Step 5️⃣: Agree to Walmart’s Terms and Conditions
Carefully review Walmart’s seller agreement and terms of service. By agreeing to these terms, you commit to complying with Walmart’s policies and guidelines for sellers. Make sure to read the terms thoroughly to understand your rights and responsibilities as a Walmart seller.
Step 6️⃣: Set Up Your Seller Profile
Once your application is approved, you’ll gain access to your seller dashboard. Walmart’s internal portal for 3P sellers is called “Walmart Seller Center“. Take the time to complete your seller profile by providing detailed information about your business, including your company logo, product catalog, shipping policies, and return procedures. A well-optimized seller profile can help attract customers and build trust in your brand.
Step 7️⃣: List Your Products
With your seller account set up, it’s time to start listing your products on Walmart’s marketplace. Use the seller dashboard to create product listings, including product titles, descriptions, images, and pricing information. Be sure to follow Walmart’s guidelines for product listings to ensure compliance and maximize visibility.
Step 8️⃣: Manage Your Inventory Keep track of your inventory levels and update your listings accordingly to avoid overselling or stockouts. Walmart provides tools and resources to help you manage your inventory effectively, including real-time inventory updates and automated replenishment options.
Congratulations! You’re now ready to start selling on Walmart’s marketplace and reach millions of potential customers. Keep an eye on your seller dashboard for performance metrics and sales insights to optimize your selling strategy over time. With dedication and perseverance, you can unlock the full potential of selling on Walmart and take your ecommerce business to new heights. Happy selling! 🚀🎉📈